This is not just a guide to a homemade kombucha recipe; it will also be an eye-opener about the benefits of the probiotic drink. The drink is simply sweetened black tea fermented with a microbial culture. It is little surprise that kombucha is from the tea-loving Manchuria region of China.
Kombucha became popular in the United States in the mid-90s after GT Dave started distributing his GT’s kombucha to local health stores. Interestingly, in addition to the health benefits of kombucha enthusiasts have found it cost-effective to brew at home.
As simple as brewing kombucha at home can be, several things can go wrong. So, we put together this kombucha brewing guide to walk you through the important steps.
What Is Kombucha and Why Make It at Home?
Once again, kombucha is a non-alcoholic beverage made by fermenting sweetened tea. The non-alcoholic tag does not mean the kombucha fermentation process yields zero alcohol. However, commercially available and most gourmet kombucha formulations often contain alcohol of less than 0.5% and a higher volume of acetic acid. Interestingly, it is possible to produce alcoholic kombucha (with over 5% alcohol), by tweaking the content of the kombucha SCOBY.
Kombucha SCOBY is the starter culture used in the fermentation of the beverage, and SCOBY is an acronym for Symbiotic Culture of Bacteria and Yeast. Commercial and gourmet kombucha are equally good and have relatively the same nutritional content. However, there are a handful of reasons why a DIY enthusiast may consider brewing kombucha at home.
- Enthusiasts sometimes develop a homemade kombucha recipe to save up on buying commercial brands.
- Home brewing allows the adoption of gourmet kombucha flavoring ideas.
- Beyond the cost and flavor, you get to leave room for creativity. For example, increasing the quantity of yeast in SCOBY to improve kombucha alcohol content.
ALSO READ: The Science of Fermentation: How Bacteria Make Foods Better
Essential Ingredients and Equipment for Kombucha Brewing
The basic ingredients needed for the kombucha fermentation process are:
- SCOBY (Symbiotic Culture of Bacteria and Yeast)
- Caffeinated Tea
- Sugar
- Filtered water
- Fruits or spices for flavoring (optional)
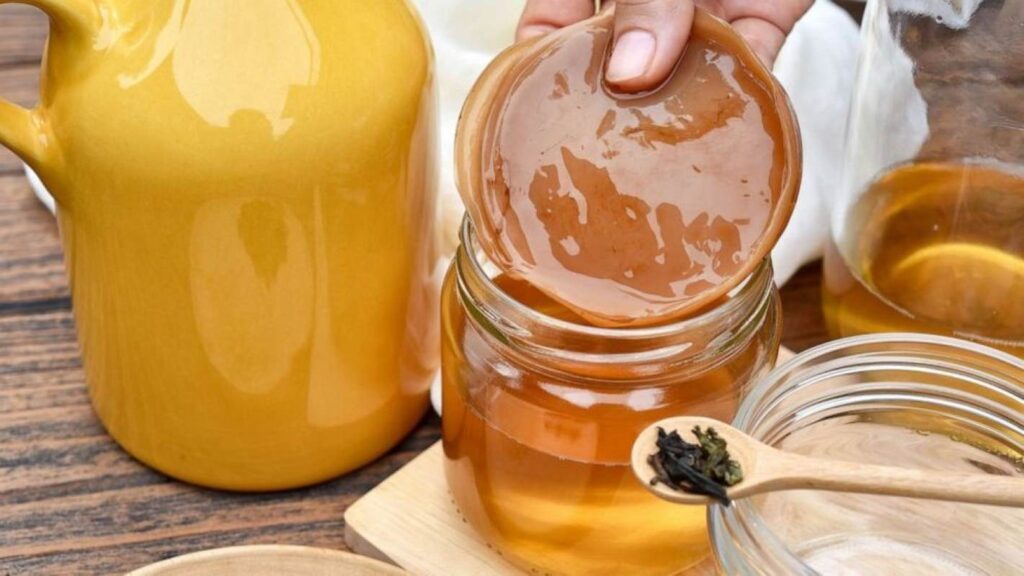
A kombucha SCOBY is also called a kombucha mushroom and is usually a gelatinous growth of bacteria and yeast. Acetobacter xylinis is the predominant bacteria in a SCOBY, while Victorian yeast is the other constituent. This duo converts sugar in the sweetened tea to acetic acid. These microorganisms are not native to the plant ingredients, so you can grow the culture at home by getting a small piece from a friend. Alternatively, you could save yourself the trouble of kombucha SCOBY care by buying from a store and growing the small culture into a bigger piece.
If your goal is to grow kombucha SCOBY, the tea should be caffeinated. Using green, white or black tea is inconsequential, so far it is caffeinated. The SCOBY growing process usually yields some kombucha, but the resulting beverage is often used as a hotel for the microbial culture.
Carrying out kombucha fermentation at home requires a couple of equipment. Rubber bands, breathable cloth or paper towel, glass jars and flip-top bottles are necessary for the homemade kombucha recipe.
Step-by-Step Guide to Brewing a Homemade Kombucha Recipe
You can follow this kombucha brewing guide to make a gallon or 4 liters of the fermented beverage at home in five easy steps:
1. Brewing the Sweet Tea Base
To follow our homemade kombucha recipe, measure two tablespoons of tea, loose or in bags, into a clean jar. Add in a full cup of granulated cane or white sugar, and turn in two cups of hot previously boiled water.
Stir the mixture with a clean spatula until the sugar dissolves and the tea steeps. Allow the mixture to drop to room temperature before proceeding to the next step.
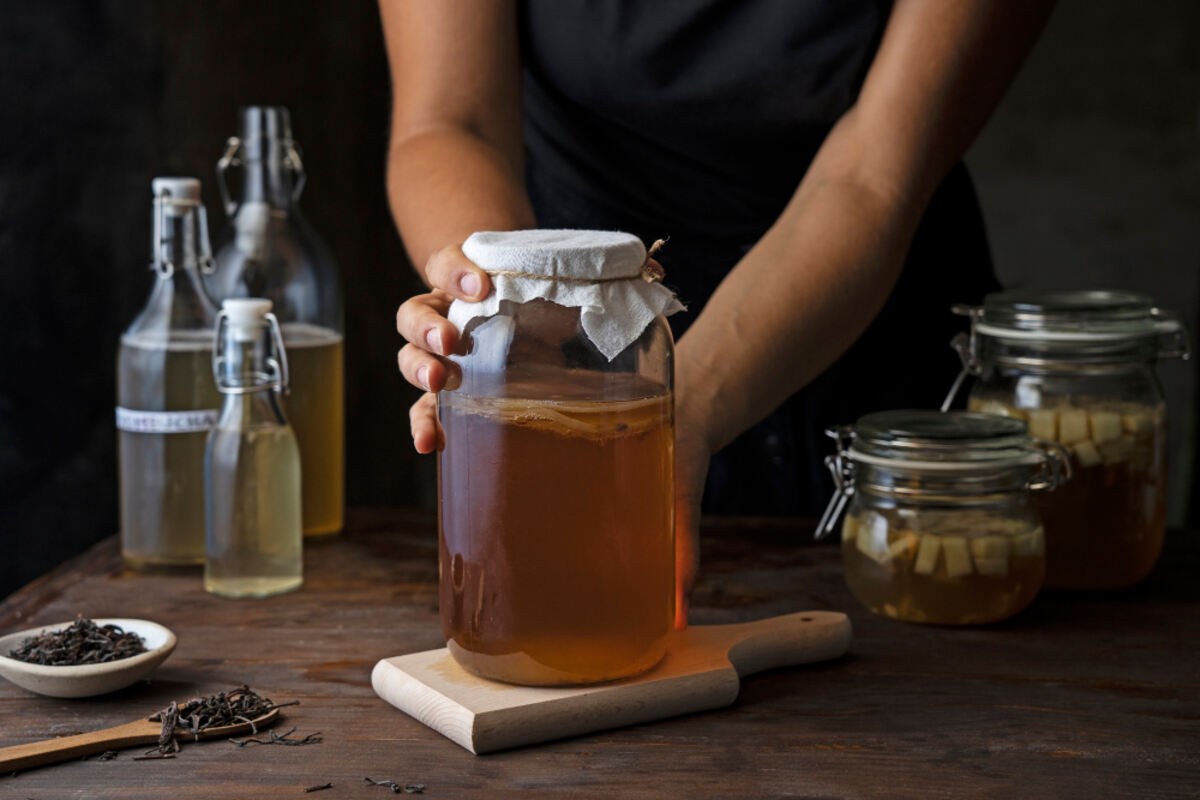
2. Adding the SCOBY
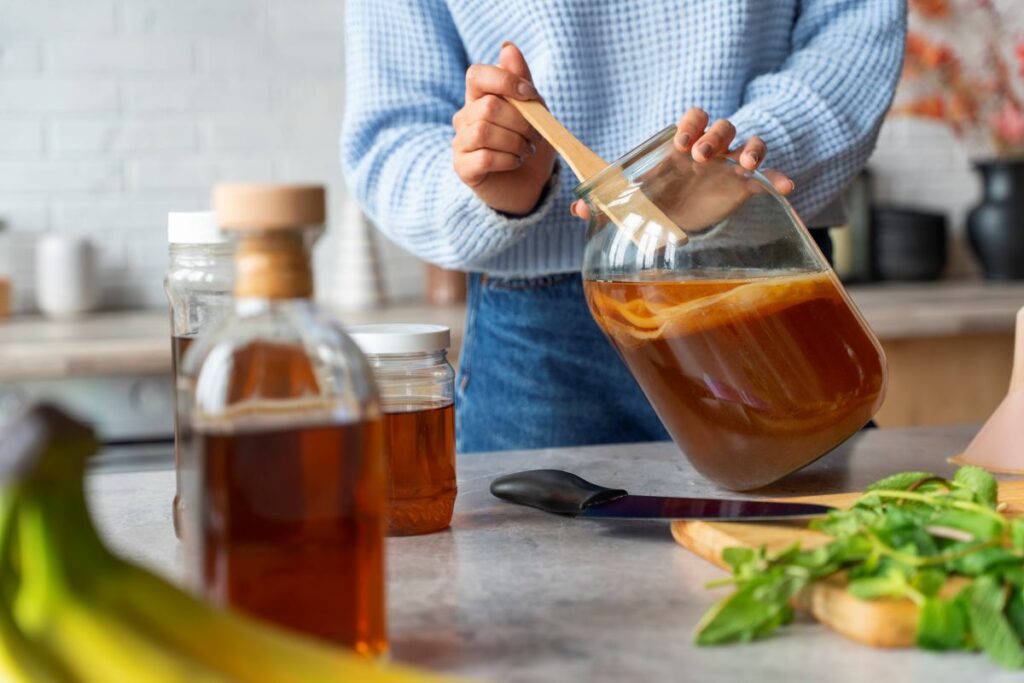
Next, prepare your 4-liter fermentation jar, one with a dispenser spout is preferable. Now, strain the spent loose tea left after the steeping period and turn the tea concentrate into the 4-liter jar. Make up the tea concentrate with four cups of cool filtered water. Add half a cup of starter Kombucha, from a previous batch or a portion of unflavored store-bought kombucha. Finally, add a piece of kombucha SCOBY, at least big enough to cover more than half of the vessel’s diameter.
3. Fermentation Process
The commencement of the kombucha fermentation process can be observed as the SCOBY starts growing in girth to cover the surface of the liquid mixture in the 4-liter jar. During the fermentation, seal off the jar lid with a paper towel or fabric linen. This allows the kombucha tea mixture to breathe during the 7 to 21 days of fermentation and keeps out impurities like dust and insects.
Prevailing factors that influence the kombucha fermentation period are the thickness of the SCOBY and prevailing seasonal temperatures.
4. Bottling and Flavoring Options
Intermittently taste the brew for tartness and proceed to bottle when you are satisfied with the level of acidity. Dispense the unflavored kombucha into clean bottles and store it in a refrigerator.
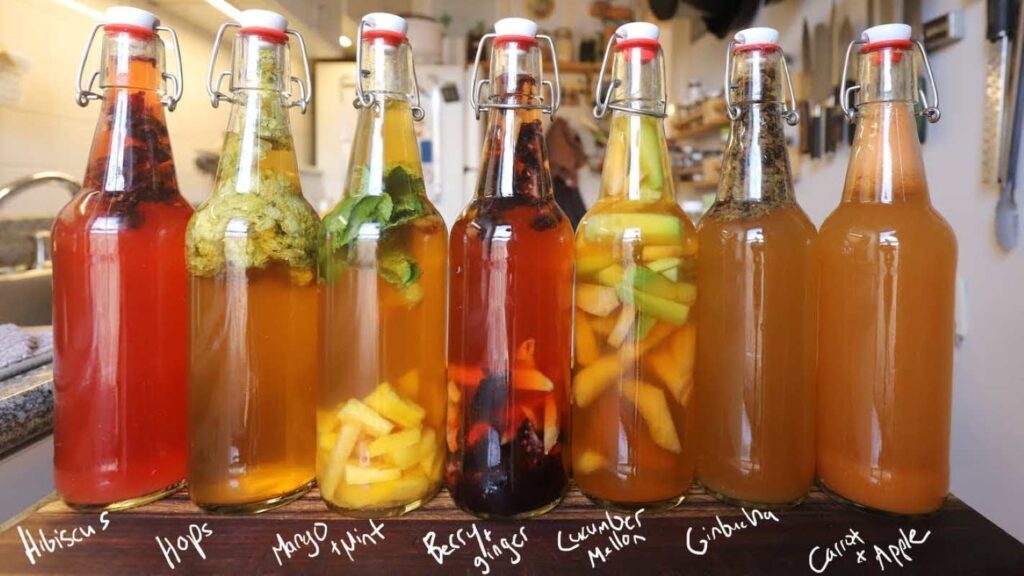
Alternatively, you can flavor the drink with fruits or spicy plants, depending on your culinary preferences and fruits that are in season. However, embracing kombucha flavoring ideas will require a second fermentation, which is also responsible for the extra fizzy beverage.
The flavoring and second fermentation of kombucha is where the flip-top bottles come in. However, the bottles must have a rubber seal for a perfect seal, so, screw-top bottles won’t cut it. You can use cuts or juices of fruits like mango, pineapple, Guyana, raspberry and ginger. Since we are pro-DIY kombucha tips, we encourage you to experiment with fruit blends.
For a one-liter bottle of unflavored kombucha, about three tablespoons of the fruit juice or three or four slices of the fruit cut should be enough. Let the flavored bottle of kombucha sit at room temperature for two to five days. Also, remember to burp the sealed bottle at least once on each day of the second fermentation. Doing this reduces the build-up of CO2 in the glass bottle.
ALSO READ: RFK Jr. Cracks Down On US Food Companies Using Artificial Additives
5. Storing and Enjoying Your Kombucha
You can store your flavored or unflavored kombucha for up to two weeks. Keeping it in a refrigerator helps to retain the desirable flavor for longer. Remember that the fermentation continues in kombucha even after bottling. So, for flavored variants be always mindful of the ongoing carbonation when storing for long.
Trust us, you don’t want to drop a glass bottle of kombucha that has been in storage for more than three weeks. The pressurized bottle will break with an explosion that could send glass pieces flying. Another of the many kombucha safety tips is to ensure the fruit slices for flavoring are submerged during the second fermentation. If any is stuck to the bottle, in the airspace, it may become a breeding ground for molds. Cap off all precautions with cleanliness, this safety tip is paramount in all aspects of kombucha brewing.
Congratulations on sticking through this kombucha bootcamp. Unfortunately, there are no certificates for this crash course on homemade kombucha recipes. However, we trust you now know enough to tweak our DIY kombucha tips, come up with new recipes and take your palates on a culinary adventure.
ABOUT THE AUTHOR

Babatunde Olufemi is a food scientist, educator, and science-based food writer with academic and practical exposure to food processing, nutrition, food safety, and the global food industry. Through Quill of Grubs, he breaks down complex food science topics into clear, accessible explanations for everyday readers, students, and professionals.